10 Easy Steps to a Great HDR Image
Step 1: Pick your shot - HDR allows you to see into the shadows. To do this, you need a subject that typically has a good amount of contrast between light and dark. HDR also draws out details that normally you wouldn't pick up on with the naked eye. So it's also good to have a subject that does have little details like wood, stone, antiques, and/or clouds just to name a few.
Step 2: Set up your tripod & camera - If you desire great shots with HDR you NEED a tripod or at least something stable to have your camera on that WILL NOT MOVE thus allowing you to take the multiple exposures you need for HDR and prevent any ghosting that could occur. Next, set up your camera. Some cameras (but not all) offer a great little setting called Auto Exposure Bracketing (AEB). Read your manual to see of your camera has this feature. If not... Don't fret, you will just have to do it manually (this is where the tripod would REALLY be required).
I use these settings on my Canon Rebel: AEB -2...0...+2, AV mode/Aperture Priority, and set the aperture to f 11. Lastly, I set the self timer to 2 seconds. Setting the timer allows you focus the shot, depress the shutter button, release the shutter button, and then allow any movement of the camera to stop... thus preventing any unwanted camera shake that could cause image ghosting. (A shutter trigger release is also a good option if you don't want to use the timer.)
Step 3: Check the ENTIRE scene - Initially, you might think have a great shot. But, be sure to look all around the entire scene before you take your shot(s). Watch out for the neighbors bright blue kiddy pool behind that old barn. The last thing you want is a great subject but the surroundings or background detracts from your focal point.
Step 4: Take the shot(s) - Once your pleased with your subject and surroundings... Take the shot(s)! I typically shoot 3 exposures (-2..0..+2)
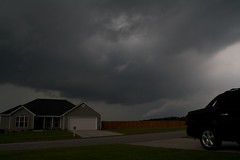
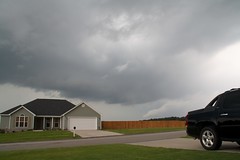
The following photos are from when I first started to dabble in the realm of HDR. These are some of my very first HDR attempts. While not great... I wanted to show that everyone has to start somewhere.
 |
| -2...1...0...+1...+2 Under Exposed = Dark |
 |
| -2...1...0...+1...+2 "Normal" Exposure |
 |
| -2...1...0...+1...+2 Over Exposed = Bright |
Step 5: Load your photos onto your computer - Can't break this one down much more... Load the images you just took (specifically, the multiple exposure AKA "bracketed"images) onto your computer.
Step 6: Select the multiple exposure images you just loaded on your computer and now load them into Photomatix Pro
- Either "Browse" for your images, or "Drag & Drop" the images into the window. ( I select all of my images and then "drag & drop" to the Photomatix Icon on my desktop. This opens/activates Photomatix with my images already selected.) Once your images are selected, click OK.
 |
| Select your bracketed/multiple exposure images. Click OK |
 |
| Check as above and click Preprocess |
 |
| Initial tone-mapped Image (Photomatix Painterly Preset selected) |
| Select any preset you would like to start with from the thumbnails that Photomatix Provide |
Step 7: Tone-map your image as you desire. Don't be afraid to toggle with the Adjustments menu (usually opens beside your image.) Adjust it until you're happy with what you have.
 |
| Once you're happy with the result, Click Process |
 |
| Your final Tone-Mapped Image will load. Click File > Save >Name and Save as 8-Bit Tiff TIP: Just save the image to your desktop to make it easy to find. |
Ta-Da!!! Your HDR Image! I like, but don't love it... yet! At this stage, I consider this a "Rough-Draft HDR" Image. Technically, you can stop here. But, I know this and all images have more potential. They can get better. On to step 8!
Step 8: Open the "Rough-Draft HDR" image with PSE10 and create a duplicate layer.
Step 9: Run the Topaz Labs DeNoise filter
Step 10: Duplicate another layer in PSE10 and then run the Topaz Labs filter Adjust 4 (or Adjust 5 if you have the newly released software). Select a preset (LEFT Menu) that you like or at least would like to start from. Make any adjustments (RIGHT Menu) , or "fine tuning" that you desire.
Step 9: Run the Topaz Labs DeNoise filter
 |
| 99% of the time, I use the JPEG - Strong setting. |
Step 10: Duplicate another layer in PSE10 and then run the Topaz Labs filter Adjust 4 (or Adjust 5 if you have the newly released software). Select a preset (LEFT Menu) that you like or at least would like to start from. Make any adjustments (RIGHT Menu) , or "fine tuning" that you desire.
 |
| I selected Topaz Adjust 4 > Whatever preset you like > Adjust Settings to you likeness > Click OK. |
 |
| Original Tone Mapped and DeNoised Image |
 |
| Final HDR Image... Notice the details in the clouds and fence now. |
Below are the software essential to creating GREAT HDR images.
I've used these essential programs from the beginning of my HDR work, and I still use them today. By far... I feel it's the best budget friendly software and plug-ins available. Especially if your very budget conscious like me.
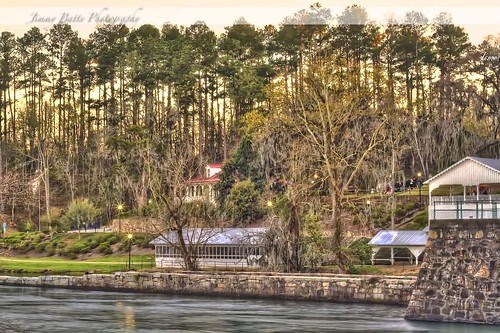
Some of my recent HDR Images
 |
| Photomatix Pro |
 |
| Photomatix Pro |
Be Great,
Jimmy Batte
10 Easy Steps to HDR
- Pick your shot
- Set up your camera & Tripod
- Check the ENTIRE scene
- Take the shot(s)
- Load your photos/images on the computer
- Load multiple exposure photos/images to Photomatix program
- Tone-Map with Photomatix and save as 8-Bit Tiff
- Open in Photoshop Elements 10 (PSE 10) and create a duplicate layer
- Run a DeNoise filter (I use Topaz DeNoise). Duplicate layer in PSE 10 again.
- Run Topaz Labs Adjust to your desired likeness.
If you have any questions, feel free to ask.


Jimmy, this is perfect, lets go with it. I love the screen shots, this will help NEWBIES a lot.
ReplyDelete